
Embarking on a digital journey? Most often, it begins with a large-scale document scanning project. While it sounds straightforward, the intricacies of such an endeavor require meticulous planning.
When you opt to digitalize your company documents, you're presented with several decisions:
- In-house scanning with your team or outsourcing to specialists?
- Onsite scanning at your office or transportation to an offsite facility?
- Do you have a bulk of paper documents? Consider breaking it down, scanning a specific count monthly while concurrently performing day-forward scans to maintain the momentum.
Whatever your decision, preparing your documents stands as the cornerstone for a successful scanning project.
Getting Started: Digitization Done Right
Your documents, logically housed in cabinets or boxes, consist of folders holding essential information. Before any digital transformation, you must decide on the digital structure. This could be at a folder level, document level, or any specific demarcation relevant to your operations.
This decision is crucial, especially during the preparation phase, as it guides where to place separator or patch sheets which contain codes directing the scanner on document separation.
Document Preparation Checklist:
- Establish a Document Preparation Zone: Choose a spacious, clean surface where you can comfortably layout and categorize your documents. Gather essential tools such as patch sheets, scissors, staple removers, letter openers, rubber bands, adhesive tape, and gloves. For added convenience, consider using a wheeled cart to facilitate the movement of boxes to and from the preparation area.
- Initiate with a Patch Sheet: Place an initial patch sheet face-up on your table to mark the conclusion of the preceding folder. Add another patch sheet—ideally, yellow for folders and pink for individual documents—to signify the last document in the prior folder.
- Unbox Folders Methodically: Begin at the back of the storage box and proceed towards the front, tackling one folder at a time.
- Extract Documents Individually: Each folder may contain a single or multiple-page document.
- For Every Document, Perform the Following Steps:
- Detach Attached Items: Safely remove paper clips, staples, rubber bands, and adhesive notes.
- Clean the documents: Make sure the papers are clean and devoid of dust or grime to prevent any imperfections in the scanned copies.
- Smooth Out the Pages: Flatten wrinkles, creases, and folded corners to ensure each line scans precisely.
- Separate Stuck Sheets: Quickly flip through the document to separate any sheets adhered to one another, ensuring no page is skipped during scanning.
- Mend Damaged Sheets: Fix any torn or damaged papers for a seamless scanning process. For unfixable damage, mark these pages for expert evaluation and advice on restoration.
- Affix Smaller Records: Attach small or irregularly shaped documents like tickets, receipts, and business cards to a standard paper sheet using tape, but only on one side.
- Sort by Size: Arrange papers of similar dimensions together to make separate scanning batches.
- Arrange Prepped Documents: Once a document is scan-ready, place it face-up on your patch sheet.
- Incorporate a Fresh Patch Sheet: Insert a new patch sheet to indicate the start of a new document and the end of the preceding one.
- Maintain the Momentum: Continue the preparation process for your document box until you exhaust the contents. Your prepped documents should resemble the reference image provided.
- Stage for Scanning: Position your prepped documents in the area designated for scanning. Make sure to maintain them in their original containers for easy re-filing post-scan.
Streamlining the Process: Segregation & Organization
Before moving to the actual scanning process, it's beneficial to sort and categorize your documents. Doing this ahead of time saves you from the hassle of rearranging digital files later on.
-
Encourage your team to identify which documents are critical for immediate tasks. Prioritize these and separate them into designated high-importance batches to be scanned first.
-
Arrange the documents in their proper page order, categorizing them by date, type, or department. This preparatory step enhances the efficiency of your scanning operations and facilitates easier search and document indexing.
-
Keep track of which documents can be safely discarded post-scanning for secure destruction, and which need to be preserved in physical storage.
If the task of preparing documents for scanning seems daunting for your internal team, don't hesitate to contact us. ScanHouse America is here to provide assistance when in-house preparation becomes too cumbersome.
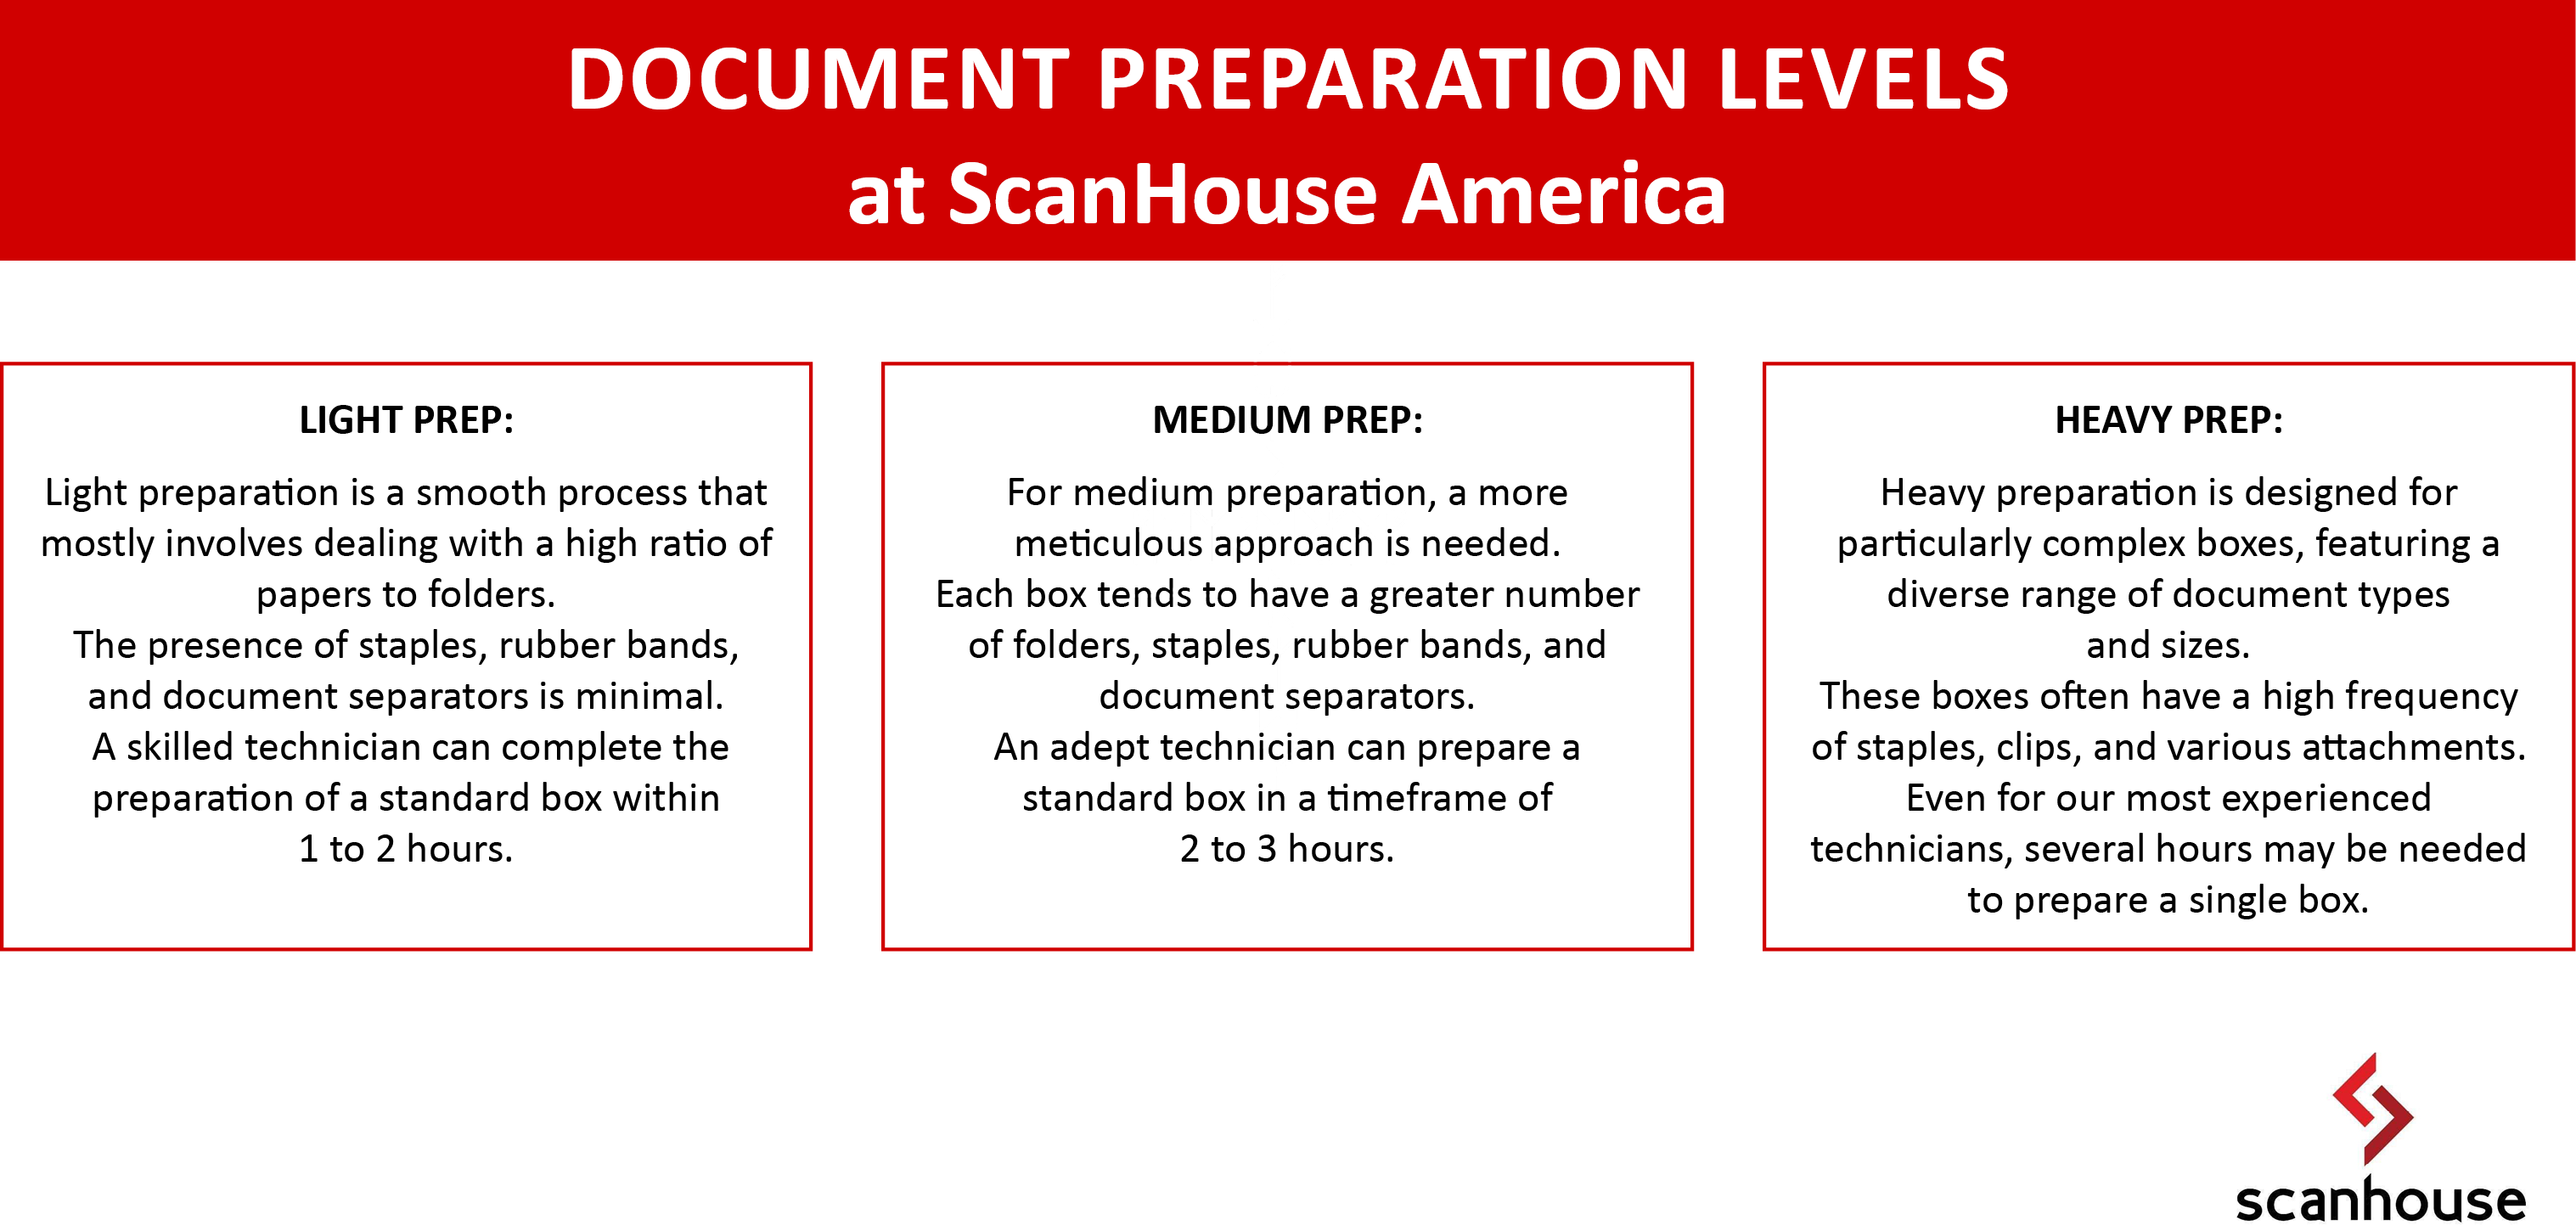
Our Document Preparation Services:
- Light Prep: Documents with minimal attachments that only require basic sorting and separator addition.
- Medium Prep: Documents need more intensive prep due to multiple attachments and breaks.
- Heavy Prep: Highly detailed documents with multiple attachments, requiring extensive labor.
- Fragile Documents: Handle with care - our team takes extra precautions with worn-out, historical, or damaged papers.
- Re-prep or Re-assemble: For those documents you wish to retain post-scan, we offer re-prepping services for an added fee.
- Bonus: Enjoy 30-days free storage for your original documents with an option for secure shredding, eliminating the hassle of re-prepping.
ScanHouse America: Your Document Scanning Service
We specialize in extensive document prep and scanning for varied sectors:
- Banking & Finance
- Education
- HR & Accounting
- Historic Archives
- Healthcare
- Oil & Gas
- Government agencies
- Engineering & Construction
- Legal firms, law department offices
- Personal Files, Notes, and Messages
Conclusion
Proper document preparation is pivotal to a successful scanning project. By following this checklist, you'll ensure the best possible outcome for your scanning endeavors at ScanHouse America. If you have questions or need assistance, our team is always here to help!
We are experts at document scanning services near Seattle.
Reach out to us to learn more about our comprehensive scanning and digitization services.
To get a free Quote Request today, or give us a call at (425) 818-1221. We’ll be in contact to help you with your project.